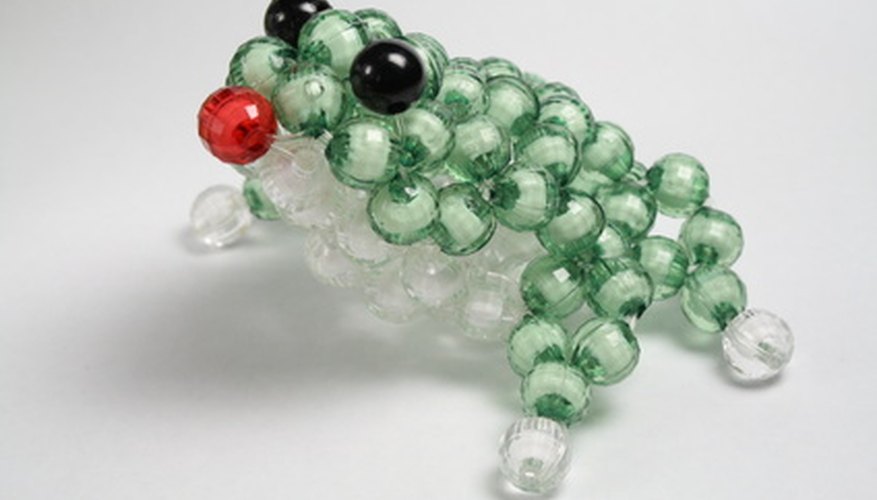
Kiowa Beads, also known as Indian beads or seed beads, are small craft beads and are available in multiple sizes. Both clear and solid beads are available in a wide range of colours. These beads, when strung on craft wire and the wire carefully bent, can be used to create 3D animals to decorate a child's room or form a backpack buddy. The size animal created is based on the size bead used. Creating 3D animals can be a great project to do with your child. These 3D animals also make great gifts.
Insure that all the beads you have selected are the same size. The size of beads determines the scale of your pattern. Using beads of multiple sizes on a single project may make your end product disproportional.
- Kiowa Beads, also known as Indian beads or seed beads, are small craft beads and are available in multiple sizes.
- The size of beads determines the scale of your pattern.
Select a pattern for the animal you desire to make. Books of patterns can be purchased online or from craft stores. Patterns are also available online for free.
Cut lengths of craft wire according to the pattern using small craft scissors or wire cutters. It is better to give yourself a little extra wire to work with, especially if you are a beginner. You can always trim away the excess wire at the end of the project. As a general rule animals take about 65 inches of wire to complete the basic body. Large appendages, like legs should take an additional 30 inches of wire. Allow 12 inches of wire for smaller appendages like, ears.
- Select a pattern for the animal you desire to make.
- Cut lengths of craft wire according to the pattern using small craft scissors or wire cutters.
String the first row of beads onto the wire and position in them in the centre of the wires length. Fold both ends of the wire down at right angles to the row of beads using the tweezers or pliers. This will prevent the beads from travelling away from the centre while you add beads to the pattern.
Thread the second row of beads onto the wire to the left of the first row of beads. Run the right end of the wire back through the beads so that both ends of the wire run through the second row of beads completely and stick out at opposite ends.
Pull on both ends of the wire to tighten the wire around the second row of beads until there is no room for the beads to shift.
- String the first row of beads onto the wire and position in them in the centre of the wires length.
- Pull on both ends of the wire to tighten the wire around the second row of beads until there is no room for the beads to shift.
Add each subsequent row of beads as shown in your pattern by first sliding the beads on the left side of the wire, and then running the right end back through. Always pull both ends to tighten the new row into position. Be careful not to catch loops in your wire.
Create an "X" with the two ends of the wire when all the rows of your animal's main body have been added to the wire. Fold the ends of the wire over one another to form a small knot.
- Create an "X" with the two ends of the wire when all the rows of your animal's main body have been added to the wire.
Cut the ends of wire just long enough to feed the ends back into the ends of the beads on the last row of the animal's body. Fold the ends into the beads to give the wire a smooth finished look.
Bend the rows of beads out in arcs. Do not alter the position of the first row of beads. Beginning with the second row of beads, arc one out to the front, and the next out toward the back for the full length of the body. This is what rounds out the animal's body cavity and makes the animal appear 3D.
Attach limbs and detail features by looping smaller pieces of wire through the beads on the body. For example run wire for the animal's ears through the two beads on the far left and two beads on the far right of the animal's head. Beads can then be feed onto the right and left sides of the wire using the same technique used to create the body.
Bend the wire in the appendages to give them an appropriate shape. Legs can be bent to show the knee joint, ears can be bent to flop over and tails can be bent to curl or wag.