The ancient Romans were well-known for their impressive art and architectural feats. Sculptural portraits of famous rulers, gods/goddesses and other important cultural figures pepper this ancient civilisation's art history, while buildings including the Pantheon have become iconic reminders of Roman glory. Students can make classroom, as well as at-home, projects based on the art and architecture of the Roman Empire that will help them to learn about this land's rich history and explore their own creativity.
Roman Architecture
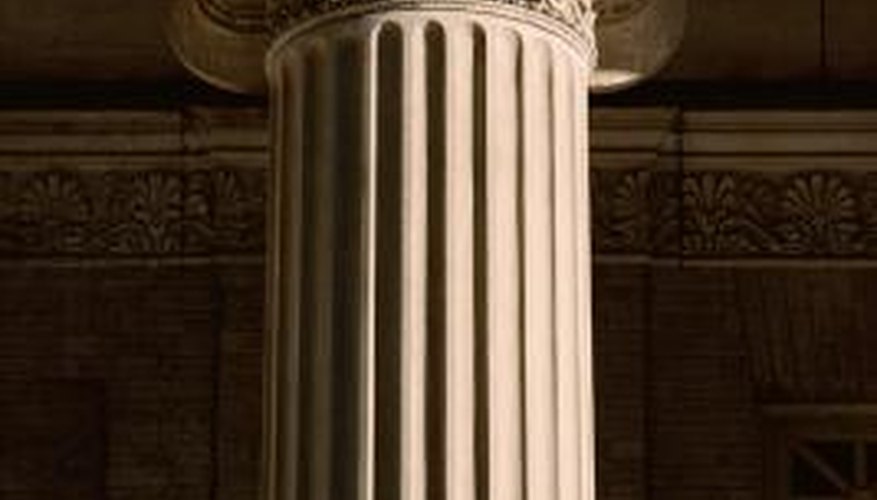
From innovative uses of the arch to the well-recognised columns of ancient times, Roman architecture illustrates the aesthetic and engineering accomplishments of this historic civilisation. Students can construct mini-models of buildings such as the Pantheon or the Colosseum using readily available arts-and-crafts materials. Start with a basic lesson about the architecture of ancient Rome, including pictures or posters of some of the key buildings. Look at simple elements such as the arch, and make sure that the kids truly understand the significance of this engineering invention. Use recycled cardboard boxes (cut into pieces), construction paper, poster board, tape, glue and even clay as materials to construct a pint-sized version of the Pantheon or other ancient Roman building. Younger children, in early elementary school, may have some degree of difficulty constructing a free-standing architectural model. In this case, alter the project to an artistic drawing or simplified blueprint sketch of the Roman building.
- From innovative uses of the arch to the well-recognised columns of ancient times, Roman architecture illustrates the aesthetic and engineering accomplishments of this historic civilisation.
- In this case, alter the project to an artistic drawing or simplified blueprint sketch of the Roman building.
Mosaics
The ancient Romans created intricate mosaic art for floors and walls out of glass, marble or stone. Inspiration for this art form often came from the Roman gods/goddesses, domestic or outdoor themes or colourful patterns and geometric shapes. While it may not be practical to create a true Roman mosaic using marble and grout in the classroom, students can create a mock version with paper and glue. Pre-cut small construction paper squares that are approximately one by one inch in size. Use a variety of colours to add creativity and interest. Give the students a blank piece of cardboard or paper that is at least 8 by 10 inches. Younger students can use a pencil to draw a basic pattern with geometric shapes, and older kids can try a more elaborate landscape or portrait-type design. Use a thick paintbrush to apply glue over the picture, and attach the paper squares in a mosaic style.
- The ancient Romans created intricate mosaic art for floors and walls out of glass, marble or stone.
- While it may not be practical to create a true Roman mosaic using marble and grout in the classroom, students can create a mock version with paper and glue.
Mythology Portrait
Like the Greeks before them, the Romans had an elaborate system of mythology incorporating gods and goddesses with many different attributes. Well-known characters such as Diana, goddess of the hunt, Cupid, the god of love, Jupiter, the king of the gods, and Neptune, the god of the sea, are often seen in the artistry of the ancient Romans. Add an art lesson to a Roman mythology unit by creating a god or goddess portrait. Ask the students to list the key attributes of the deity before beginning the art-making process. For example, depictions of Neptune would include sea themes and a trident. After the students list points to note, use crayons, markers or coloured pencils on white drawing paper to illustrate a portrait-style version of the chosen Roman god/goddess.
- Like the Greeks before them, the Romans had an elaborate system of mythology incorporating gods and goddesses with many different attributes.
- After the students list points to note, use crayons, markers or coloured pencils on white drawing paper to illustrate a portrait-style version of the chosen Roman god/goddess.
Coins
Th early Roman-cast bronze, and later gold and silver, coins are well-known symbols of the long-running empire. Students can make their own versions of the coins in the classroom using cardboard, clay and metallic paints. After reviewing a few different Roman emperors, ask the children to choose one and draw a preliminary, or rough-draft type, portrait. Use photos or posters of Roman sculpture as a model. Cut pieces of cardboard into circles that have a radius of at least six inches. Draw the head of the emperor onto the cardboard, filling the whole circle. Use modelling clay to build up the face. Roll it into small balls to make eyes, apply it to the outline of the face or make thin coils for hair. Press the clay onto the board or use glue to secure. Add a finish of metallic paint for a realistic coin look.
- Th early Roman-cast bronze, and later gold and silver, coins are well-known symbols of the long-running empire.
- Roll it into small balls to make eyes, apply it to the outline of the face or make thin coils for hair.