Because unplasticized PVC is harder and less flexible than standard PVC, it is used to manufacture double-glazed and standard window frames. However, many manufacturers void their product warranty if you drill the material before attaching it to the blinds.
- Because unplasticized PVC is harder and less flexible than standard PVC, it is used to manufacture double-glazed and standard window frames.
- However, many manufacturers void their product warranty if you drill the material before attaching it to the blinds.
To overcome this problem, some blind manufacturers have developed a mounting frame that clips onto the window without using screws. Alternatively, you can attach blinds away from the uPVC window frame above the window opening on the inside wall.
Inspect your window frame to determine if the glass is sealed with a glazing gasket before purchasing a clip-on blind. If you are unsure, ask the blind vendor for guidance. If the window has been sealed with glazing tape instead of a gasket, go to Step 8 to install a standard blind.
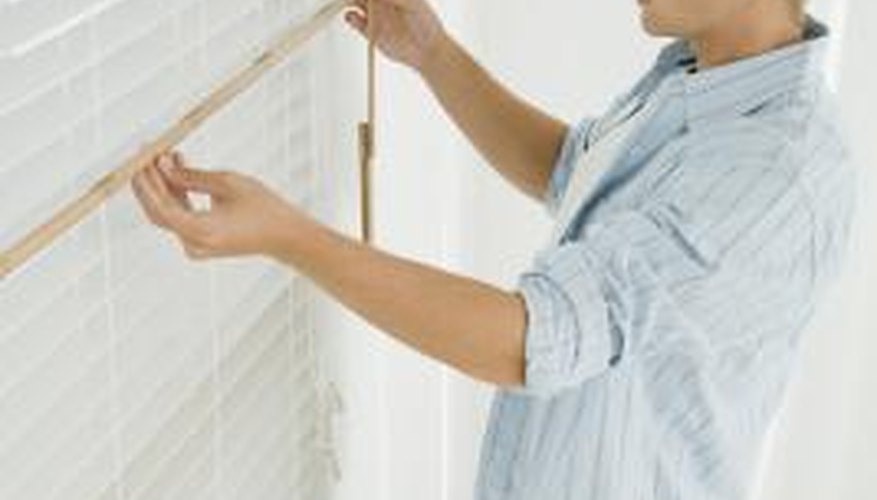
Measure the distance from the edge of the frame to the handle (if fitted), with a steel ruler or a depth gauge. If there is less that 1/4-inch clearance, use spacers to raise the handle; these can be bought from the blind vendor.
- Measure the distance from the edge of the frame to the handle (if fitted), with a steel ruler or a depth gauge.
- If there is less that 1/4-inch clearance, use spacers to raise the handle; these can be bought from the blind vendor.
Determine the size of the glass from corner to corner inside the frame for the vendor to size the attaching frame. Follow the manufacturer's instructions and use an ultrasonic or laser digital measuring tape if possible, otherwise use a steel ruler or measuring tape. If you use this method, measure from the centre point outward on each side; the measurement must be accurate to within 1/64th of an inch.
Measure the distance from the glass to the face of the window frame with a depth gauge. This will determine the size and positioning of the clip-in brackets.
Lay the frame sections facedown on a table with the closed blind uppermost. Insert the corner bracket into the slots on the ends of the vertical and upright frame sections to create a rectangular frame. Tighten the four attaching screws on each corner with a Phillips screwdriver. Push the corner covers over the front of the frame and secure to the back with the screws provided.
- Lay the frame sections facedown on a table with the closed blind uppermost.
- Push the corner covers over the front of the frame and secure to the back with the screws provided.
Place the measuring card provided against the top left-hand corner of the glass. Lubricate the mounting bracket with dish-washing liquid. Slide the bracket against the bottom edge of the card between the glass and the glazing gasket. Push it all the way in until it is hard up against the bead. Repeat with the other three mounting brackets.
Lift the assembly with the blind attached into the window frame. Align the holes in the frame with the fixing brackets on each corner. Start at the top left and clip each bracket into the frame until the small clip on the bracket clicks into the adjacent hole in the frame.
- Lift the assembly with the blind attached into the window frame.
Mark both centre lines on the window opening and the top of the standard blind head rail with a pencil and carpenter's square. Hold the blind in place above the opening with the centre lines matched up and the bottom of the head rail lined up with the top of the opening. Place a spirit level on top of the blind and centre the bubble. Mark the ends and upper surface on either side of the wall with a pencil to position the mounting brackets.
Open the door hinge on the left-hand mounting bracket. Position the bracket against the wall with the left-hand edge and top lined up with the pencil marks. Mark the two screw holes on the wall with a pencil.
Drill two pilot holes into the wall using a 1/8-inch twist drill and a cordless drill/driver. Fit a screwdriver attachment to the drill and use it to screw the mounting bracket to the wall with the screws provided. Repeat with the right-hand mounting bracket.
Remove the plastic end caps from the head rail. Place the U-shaped fascia clips provided in the kit over either end of the head rail from the back with the prongs facing forward. Slide the head rail into the open mounting brackets. Close the doors on the brackets and snap them shut. Clip the head rail fascia board to the fascia clips on the head rail.
- Open the door hinge on the left-hand mounting bracket.
- Remove the plastic end caps from the head rail.