Clear silicone is used for many tasks in home improvement to seal gaps or join two surfaces. In some instances, this material gets onto painted wall surfaces and dries. Whether it is a large amount that is noticeably raised from the wall or is a non-paintable brand, it must be removed before repainting. Walls are easily damaged so care is required when removing the silicone without causing the need for more repairs. Work slowly and evenly to remove clear silicone a little at a time instead of trying to remove it all at once.
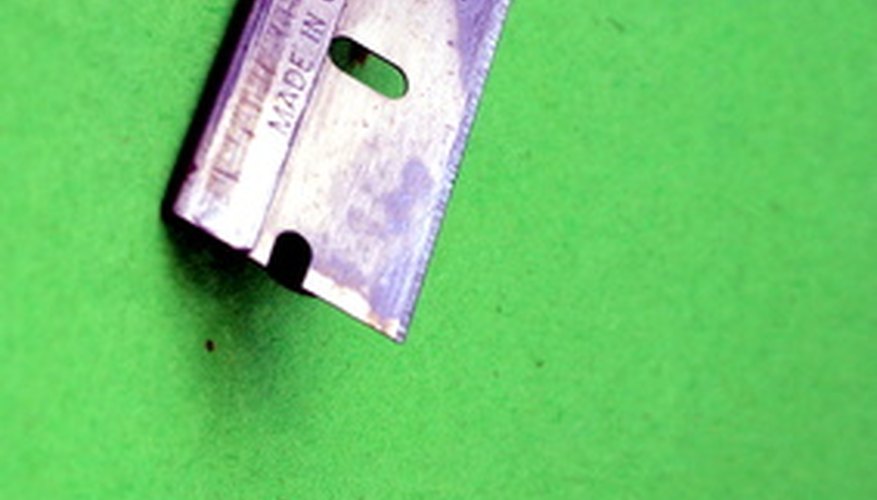
Hold a razor blade or sharp metal scraper at a 30-degree angle to the wall and slowly shave the silicone from the wall. Start scraping at a point before the silicone appears to get the blade tight to the wall.
- Clear silicone is used for many tasks in home improvement to seal gaps or join two surfaces.
- Hold a razor blade or sharp metal scraper at a 30-degree angle to the wall and slowly shave the silicone from the wall.
Apply even pressure while scraping at the silicone to avoid damaging the wall surface. Remove the shaved silicone pieces from the wall and scraping tool and dispose of them properly. Occasionally wipe away any build-up on the edge of the tool with a cloth so it stays sharp.
Mix a mild cleaning solution of 1/2 cup grease-cutting cleanser and 1/2 cup water in a small bowl. Dip a sponge into the cleaner and apply a coating over the silicone area. For smaller areas, use a cotton ball. Leave it on the wall for five minutes.
- Apply even pressure while scraping at the silicone to avoid damaging the wall surface.
- Dip a sponge into the cleaner and apply a coating over the silicone area.
Wipe the area with a damp sponge to remove the cleanser and any silicone residue. Rinse the sponge after each pass so that the sponge only has clean water on it. Repeat the cleaning solution application and removal as many times as necessary to remove as much as possible.
Buff the area with very fine-grit sandpaper for a few light strokes to get the wall free of any last bits of silicone. This helps prepare the wall for new paint or wallpaper application.
TIP
If the wall still has some residue that won't come off, consider applying and then sanding a thin coat of drywall mud to cover the area and match the rest of the wall.
WARNING
Avoid scraping at the wall with a chopping motion, or scraping the tool back and forth, as this will damage the wall surface. Use caution when scraping with sharp objects that you don't accidentally cut yourself.