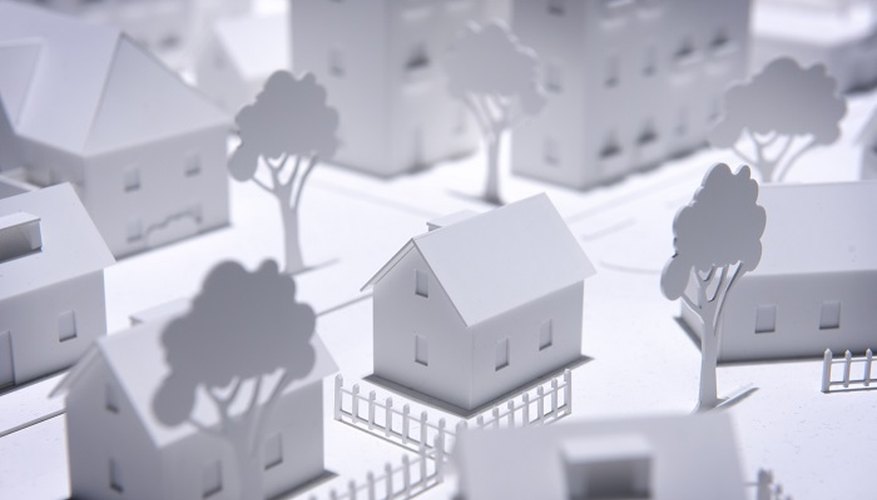
A model village can be made with cardboard buildings made from a commercially printed book or ceramic pieces. Construct buildings by hand from foam board or wooden craft pieces. You can design your own Victorian Christmas scene, historical, current or futuristic village with the materials. Historical information should be well researched to make an accurate replica of a real village. Search for photos or drawings of the village if you are completing this project for a school or museum birthday celebration project.
- A model village can be made with cardboard buildings made from a commercially printed book or ceramic pieces.
- Search for photos or drawings of the village if you are completing this project for a school or museum birthday celebration project.
Draw a detailed sketch of the village you want to make.
Buy pre-made buildings or construct your own from craft wood, foam board or cardboard. You can make buildings from recyclable material for a school project.
Measure the base of each completed model building. Record the building name and measurements in your notes.
Select the board that you will use for the foundation of the model village. Use your drawing as a guide to measure and plot out where each building and village feature will be placed. For example, use a ruler to accurately draw a square or rectangle for a building according to the model size.
- Measure the base of each completed model building.
- Use your drawing as a guide to measure and plot out where each building and village feature will be placed.
Mix the modelling clay according to the package directions. Apply a 1.25 cm (1/2 inch) thick layer of the wet material to the foundation board. Use a spoon, spatula and palette knife to spread and carve the material. Add more clay and carve the ground area making a road, natural features such as waterways and hills within the village. Leave the building foundation area sections as smooth as possible. Let dry at least 48 hours.
Place the buildings on to the board to test if they will fit. Use a craft knife to carefully carve away clay that is causing a building to sit unevenly. Remove the buildings.
- Place the buildings on to the board to test if they will fit.
Paint the entire area of clay with colours that are appropriate for soil, pavement and waterways. Add greens to the clay for lawns. Let dry at least 24 hours.
Place the buildings back in place. If this will be a permanent display you can stick them to the board and clay with an adhesive that is appropriate for the material the building is made from.
Glue artificial trees, fences, vehicles, animals and human figurines to the base along the streets and outside of buildings. Make sure that these items match the scale of the size of the buildings.
Make telephone poles by cutting dowel sticks to a size that matches the buildings, if they belong to the time period of your village project. Paint the poles a rusty brown colour. Attach thin wire or thick thread to the poles for the telephone wires. There are commercially produced light poles that run on batteries, if you need a light source for your village.
- Glue artificial trees, fences, vehicles, animals and human figurines to the base along the streets and outside of buildings.
- Make telephone poles by cutting dowel sticks to a size that matches the buildings, if they belong to the time period of your village project.
Glue dried lichen, moss sand and small stones to the area for a more realistic look of gravel, rocks and bushes.
TIP
Measure, measure, measure. Before you begin, be sure that your measurements are accurate.
If heavy materials will be used for the buildings you should use a wooden base.
WARNING
It is important to let clay and paint dry thoroughly before moving on to a new step or you can have a damaged project.