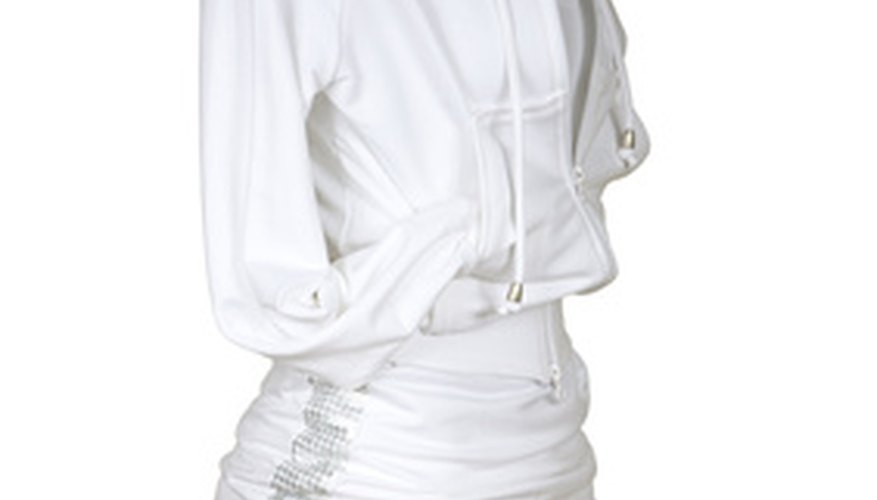
Take tracksuits to another level by creating them yourself; it's easier than you think. By creating a quick and expensive pattern from another tracksuit, or even a most loved top and pair of trousers, you can easily create a small wardrobe of tracksuits. Have fun by creating different categories: leisure, sports, loungewear, etc. When creating your own tracksuits, you can easily tailor them to best suit your body type, creating a more polished look. Never be afraid to answer the door on a lazy Saturday again. Let a homemade tracksuit give you a relaxed, yet put-together look.
Go through your wardrobe and select pieces that you feel make your body look good, and will suit the purpose of your tracksuit. Skinny jeans may be appropriate for legging style jogging trousers, while slacks may give you the room you need to do yoga or paint. Remember that what looks good in tweed may not transfer well to nylon; consider how the current garment will hang on you in your intended fabric choice.
- Take tracksuits to another level by creating them yourself; it's easier than you think.
- Go through your wardrobe and select pieces that you feel make your body look good, and will suit the purpose of your tracksuit.
Gather your necessary supplies. If you are a novice, don't be afraid to ask questions when purchasing your supplies. You may even want to take a sketch, photo or the outfit itself to get advice on what fabric may best suit your project.
Prep your materials. Thread the sewing machine or sewing needle, fold the fabric for the trousers lengthwise right side to right side, fold the fabric for the top widthways right side to right side then fold in half once more lengthwise. Pin the open edges of the fabric for both the top and bottom. Attach the safety pin to one end of the elastic.
- Gather your necessary supplies.
- Pin the open edges of the fabric for both the top and bottom.
Fold your existing top in half so that the front is exposed. Lay it on top of the creased section of the fabric. The front of the shirt should be against the crease of the fabric, with the arm trailing behind the body of the shirt and against the top crease. Pin the top to the fabric.
- Fold your existing top in half so that the front is exposed.
Trace the garment with tailor's chalk or a washable fabric marker, leaving a 1/2-inch allowance for seams. Don't forget to trace the curve of the neck, and remember that you can lengthen the top if you desire. Remove the garment from the fabric, but leave the pins in place. Carefully cut out your new top.
Fold a scrap of fabric if desired to create a facing, or substitute with decorative materials. For a raw or worn-in look, omit the facing and stitch close to the edge of the fabric, or fold over a small amount and stitch. Open the top to stitch the neck as you see fit. With the top inside out, align the arms and front and back of the top and pin them in place with a 1/2-inch seam allowance. Sew up the underside of the arms and the sides of the body of the top. Fold up the sleeves and bottom of the shirt, pin in place and hem. Turn right side out.
- Fold a scrap of fabric if desired to create a facing, or substitute with decorative materials.
- For a raw or worn-in look, omit the facing and stitch close to the edge of the fabric, or fold over a small amount and stitch.
Create the back of your trousers by folding your existing pair front to front. Lay them on the fabric, making sure that the crotch is prominently defined, and pin in place. Make a seam allowance of 1/2 inch, a hem allowance, and a waist allowance if you want your trousers to be looser as opposed to fitted. Trace the outline and remove the trousers.
Fold your existing pair back to back to create the front of your trousers and repeat the process in Step 1. When complete, cut out the pieces for your new bottoms. Taking one piece of the front and one piece of the back, with a seam allowance, then pin the sides of the legs together inside out and keep the crotch open. Stitch the sides up and repeat the process with the other leg.
- Create the back of your trousers by folding your existing pair front to front.
- Taking one piece of the front and one piece of the back, with a seam allowance, then pin the sides of the legs together inside out and keep the crotch open.
Align the crotch pieces of each leg and sew them together. Fold over a waistband to create the desired height of bottoms. Pin and sew in place, leaving an opening of about 1 inch for elastic. Take the elastic and insert the end with the safety pin into the opening of the waistband. Use the safety pin to guide you in pulling the elastic through to the other side of the opening. When the ends of the elastic meet, sew them together. Close the opening in the waistband, and turn your new bottoms right side out.
- Align the crotch pieces of each leg and sew them together.
- Close the opening in the waistband, and turn your new bottoms right side out.
TIP
With practice, you can have fun experimenting with different looks: add hoods, zippers, buttons, shorten or lengthen arms and legs, or create a drawstring waistband on the outside of your trousers. Instead of tracing your outfit right onto the fabric, trace it on paper grocery bags to create patterns that you can adapt and reuse in the future.
WARNING
Follow manufacturer's instructions when using any sewing machine. Results may vary due to skill level and fabric choice.