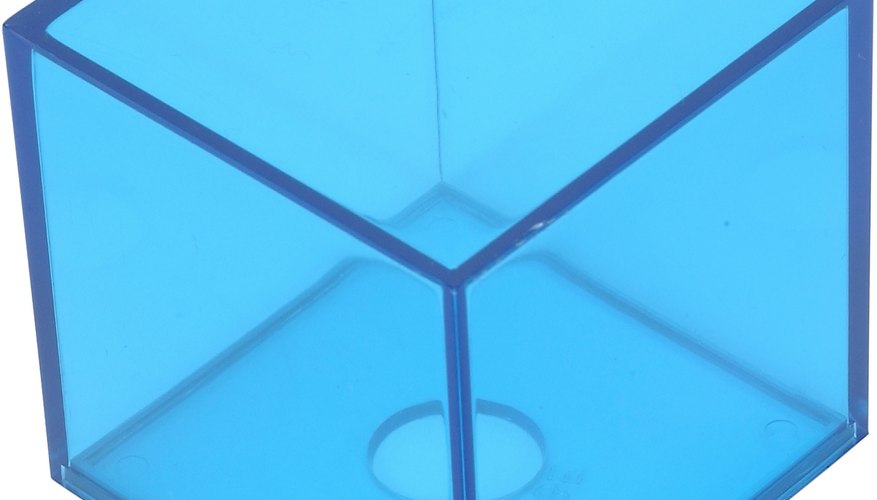
Make your own shadow boxes, display cases, plant propagators, decorative containers and fish-tanks from Perspex acrylic sheets. You can find pre-cut Perspex sheets, get the sheets cut by a plastic shop or cut them yourself using a table saw. Choose clear colourless Perspex when you want the maximum amount of light -- for displays, fish-tanks and propagators, for instance. For decorative items, you can find Perspex in a range of colours and finishes.
Calculate the size of the box you wish to build. Sketch the whole design on paper, noting accurate dimensions for each side. Sketch the pieces you'll need separately, including accurate measurements for each side. You can use either outer or inner measurements.
- Make your own shadow boxes, display cases, plant propagators, decorative containers and fish-tanks from Perspex acrylic sheets.
- Sketch the pieces you'll need separately, including accurate measurements for each side.
Measure your Perspex sheet using the set square and ruler to ensure precise measurements, accurate right angles perfectly straight sides. Mark using a fine dry-erase marker or scoring knife; do not use solvent-based pens on Perspex as they may be hard to remove. If the Perspex is covered in a protective paper sheet, mark your measurements on this and remove it after the pieces are cut.
Set up your table saw. Ensure that the blade you use is suitable for Perspex; acrylic can melt from the friction of saws and drills, giving inferior cuts and ruining the blade or bit. Blade lubricant can help prevent this. Position a zero-clearance insert over the blade to stabilise it and make the cut more precise.
- Measure your Perspex sheet using the set square and ruler to ensure precise measurements, accurate right angles perfectly straight sides.
- Ensure that the blade you use is suitable for Perspex; acrylic can melt from the friction of saws and drills, giving inferior cuts and ruining the blade or bit.
Feed the Perspex into the saw blade. Keep the feed rate steady; too fast or too slow and the Perspex may begin to melt or crack, while erratic feeding can make the cut edge uneven. You want the edges to be as smooth and precise as possible to aid gluing and make neat joins. It is a good idea to practice on some offcuts first.
- Feed the Perspex into the saw blade.
- Keep the feed rate steady; too fast or too slow and the Perspex may begin to melt or crack, while erratic feeding can make the cut edge uneven.
Finish the edges of the Perspex by smoothing them with an edge scraper or plastic plane. Do not remove too much material. Very fine sandpaper can also help. You can also use a router to finish the edges but this can create excess heat, melting the edge and making it more uneven.
Assemble the two pieces you wish to join first, clamping one in a vice with the edge to be glued uppermost and supporting the other so it rests on top. Prop up the top piece by securing the edge in a second vice or supporting it on folded cardboard, offcuts of wood or chunks of modelling clay. Use wood inserts in the vices to protect the acrylic. The edges of the join must be pressed tightly together with no gaps.
Apply a very small amount of acrylic cement from a syringe or a tube with a fine applicator, starting a little distance from one corner and working away from it. The cement should be wicked up by the joint. Apply more cement until the entire joint is welded. If the edges are not smooth and pressed closely together, the capillary action method of welding the Perspex will not work and you will have to use a thicker cement which will leave more visible joins.
- Assemble the two pieces you wish to join first, clamping one in a vice with the edge to be glued uppermost and supporting the other so it rests on top.
- If the edges are not smooth and pressed closely together, the capillary action method of welding the Perspex will not work and you will have to use a thicker cement which will leave more visible joins.
Leave the pieces to dry for at least 10 minutes before repositioning. Assemble the rest of your box in the same way.
TIP
Allow for the thickness of the acrylic when assessing the dimensions of the box; decide whether it will be assembled by attaching the edges of the sides to the base or by attaching the edges of the face to the sides, as this will affect your measurements.
If your Perspex is less than 3 mm (1/8 inch) thick you can cut it by scoring it deeply with a glass cutter or an acrylic scoring knife, then snapping it along the scored line. This may leave a ragged edge, however.
You can thicken acrylic cement by mixing it with a few Perspex shavings in a sealed container. Leave overnight and stir thoroughly before use.
WARNING
Use saw blades with care as they can cause severe injury. Do not wear loose clothing. Tie back long hair. Wear eye protection when using a table saw.
Acrylic cements contains solvents that give off toxic fumes and can harm your skin and eyes. Only use them in a well-ventilated area. Protect your hands with barrier cream or gloves.
Protect pets and children by keeping them away from blades and solvents.