
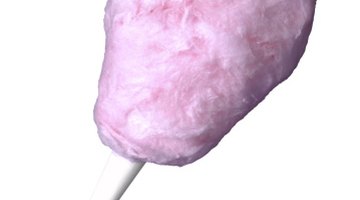
Making clouds in Adobe Photoshop that look like candyfloss floating in the sky is fairly easy to do, especially for someone already familiar with the basic tools in Photoshop. You will use the paint brush tool and a few filters to achieve this effect. The clouds can be created in shades of blue or pink. Photographs of actual candyfloss can also be used to create clouds in Photoshop.

Create a new, blank Photoshop document. Select the menu: "File<New".
Choose the paintbrush tool and set the diameter to a minimum size of 319 pixels and 0% hardness. Drag the mouse over your canvas where you would like to apply paint. You will see a small circular shape to indicate where your brush is applying paint. The size and hardness brush control function is accessible by double clicking your paint brush icon in the tool panel, to show the sub-menu. Click the brush tip icon to bring up the brush control settings. The appearance of these options changes slightly with older versions of Photoshop.
- Making clouds in Adobe Photoshop that look like candyfloss floating in the sky is fairly easy to do, especially for someone already familiar with the basic tools in Photoshop.
- Click the brush tip icon to bring up the brush control settings.
Select the starting colour of your pink candyfloss clouds. Click on the colour selector tool to choose a darker shade of pink.
In the colour palette, choose web colour #af79bd, or colour build CMYK set to: C-32%, M-60%, Y-0%, K--0%. That will result in a dark shade of rose pink suitable for candyfloss clouds.
Paint several large areas of pink colour in the shape of clouds using the paintbrush tool with the above settings.
Burn the edges of the painted area with the 'Dodge and Burn' tool, which will darken selected areas. As you burn the edges with this tool, try setting the brush size of the burn tool with different settings, specifically to smaller diameters and add at least 40% hardness.
- Select the starting colour of your pink candyfloss clouds.
- Burn the edges of the painted area with the 'Dodge and Burn' tool, which will darken selected areas.
Highlight the candyfloss clouds, using the 'Dodge' option of the dodge and burn tool to add lightened spots in the centre parts of the clouds you have created.
Blur your candyfloss clouds with a circular, radial blur. Do this by selecting the menu: "Filter>Blur>Radial Blur" set to about 24. You can experiment with the blur numbers to achieve slightly different visual effects.
- Highlight the candyfloss clouds, using the 'Dodge' option of the dodge and burn tool to add lightened spots in the centre parts of the clouds you have created.
- Do this by selecting the menu: "Filter>Blur>Radial Blur" set to about 24.
Texturise your clouds by applying a special accented edge filter. Do this by selecting the menu: "Filter>Brush Strokes>Accented Edges". Menu settings are as follows: edge width should be set to at least 12, edge brightness at least 42, and smoothness set to 7.
TIP
Vary your brush sizes for the clouds, and dodge and burn tool in order to create different sizes of clouds. Change the numbers on the filter settings by moving the sliders to preview the different visual effect it will have on your clouds.