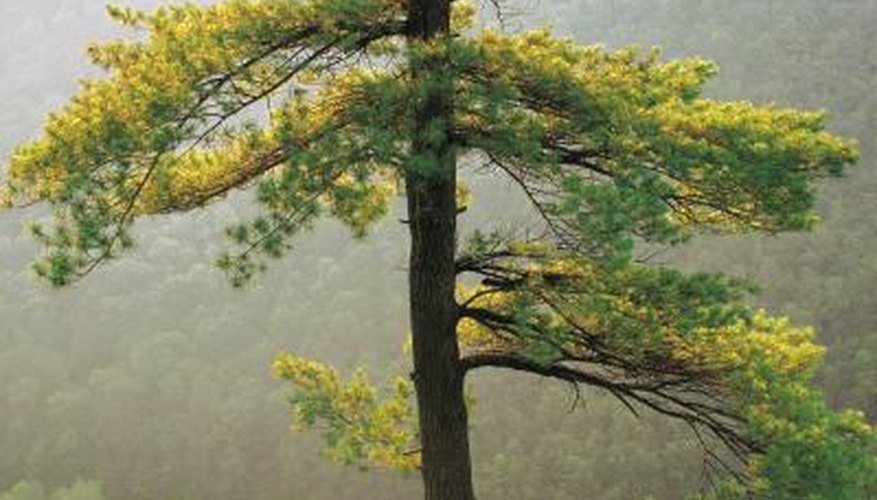
The larch is a conifer tree with unusually deciduous needles. The plant defoliates in winter and regrows new foliage in spring. There are several larches often used in the landscape. The common larch is also known as the European larch. The Western, subalpine and Eastern larches are all native to North America. The trees are fast-growing hardwoods. They can be propagated by seed, but the trees produce a low yield of seeds and cones. Larches are easy to graft and therefore easier to grow vegetatively than by seed. Softwood cuttings are done in summer, while hardwood cuttings are done in winter. Softwood cuttings show the greatest success.
- The larch is a conifer tree with unusually deciduous needles.
- They can be propagated by seed, but the trees produce a low yield of seeds and cones.
Take the cutting on a cool morning when the plant stems are flexible. Use a very sharp knife to make a straight cutting on a terminal branch that is 6 to 8 inches long. Include three to four growth nodes, as the bumps along the wood are known. Cut just before the final growth node.
Place the cutting in a plastic bag with damp paper towels. Wrap the towels around the cut end of the stem. Put the bag in the refrigerator if you will not be planting for more than a day.
- Take the cutting on a cool morning when the plant stems are flexible.
- Wrap the towels around the cut end of the stem.
Mix equal parts of peat and perlite and fill the pot. Make certain the pot has drainage holes. Remove the cutting from the paper towels and bag and dip the cut end into rubbing alcohol to clean it. Allow it to dry for a minute and then dip the cut end into rooting hormone. Shake the cutting a little to remove the excess hormone powder.
- Mix equal parts of peat and perlite and fill the pot.
- Remove the cutting from the paper towels and bag and dip the cut end into rubbing alcohol to clean it.
Remove the foliage from the stem. Plant the cutting into the potting medium, burying at least 2 growth nodes. Water the cutting just until water begins to drip out of the pot's drainage holes. Keep the pot evenly moist but not soaking wet. Dip a finger into the side of the soil to check for dampness or touch the soil at the drainage hole to see if it is cool.
Place the pot in low light for the first two weeks while the cutting roots. Grow it in brighter light until the plant has a good root system. Gradually introduce the plant to outdoor temperatures over a week by putting it outside for a period every day, extending the time it is put outside each day. When it has acclimated to the outdoors, plant it in a larger pot or directly into the soil.