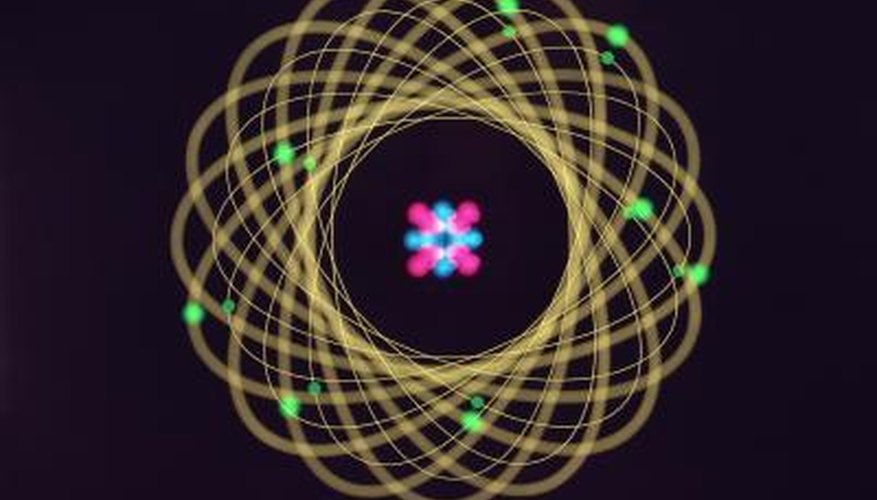
Beryllium, or Be, is atomic number 4 on the periodic table of elements. This means the beryllium atom has four protons and four electrons. The number of neutrons present varies in the beryllium atom, making three isotopes -- atoms with different physical properties -- possible. Beryllium may have three, five or six neutrons in its nucleus. The isotope beryllium-9, with five neutrons, is the stable form of the atom. Creating a 3D model provides a child with a visual representation of a beryllium atom.
- Beryllium, or Be, is atomic number 4 on the periodic table of elements.
- The isotope beryllium-9, with five neutrons, is the stable form of the atom.
Paint four styrofoam balls one colour and five styrofoam balls a different colour; let them dry completely. The four styrofoam balls are the protons in the nucleus and the other five are the neutrons. Together they represent the stable isotope of beryllium.
Connect the styrofoam balls using hot glue. Mix up the order as much as possible. Don't connect all the protons on one side of the nucleus and all the neutrons on the other.
- Connect the styrofoam balls using hot glue.
Press two marshmallows onto a thin wire. Connect the ends of the wire to make a circle. The nucleus you created in Step 2 must be able to fit inside the circle. This is the inner electron shell of the element, which can hold only two electrons.
Place two marshmallows onto a long piece of wire, connecting the ends to make a circle. This circle should be larger and easily enclose the first circle. It represents the valence electron shell of beryllium. Beryllium has only four electrons total.
Connect the two wire electron shells using fishing line. Use two pieces of fishing line to connect the top and bottom sections of the wire shells together. Doing it in this manner will allow the shells to spin independently of each other.
- Place two marshmallows onto a long piece of wire, connecting the ends to make a circle.
- Use two pieces of fishing line to connect the top and bottom sections of the wire shells together.
Connect the nucleus and wire electron shells to the wire ring using fishing line. Use the hot glue gun to hold the fishing line in place on the nucleus. Use two or three lengths of fishing line to guarantee the nucleus will stay in place. Tie fishing line from the wire electron shells to the wire ring , keeping the nucleus in the centre of the mobile you have created.