Pebble dashing, an exterior finish in which small, smooth stones are embedded into the outer coat of mortar on the walls of a property, became popular after the Second World War when a lack of skilled workmen led to it regularly being used to cover up shoddy brickwork. New techniques and materials have revived the use of pebble dashing, also known as dry dashing, as the addition of stones to the render helps to provide the home with additional protection against the elements.
Inspect the wall to be pebble dashed to ensure its surface is sound. Use a wire brush to remove any loose debris. Patch any cracks and then treat the wall with a fungicidal wash, particularly if there is any evidence of mould.
Mix the render with the appropriate amount of water in a large bucket until it turns into a smooth paste. Spray the wall with a little water before applying the render. Load render onto the hawk, then transfer it to the wall with a steel float using an upward, sweeping motion. Blend the bands of render with the float to remove any lines and leave an even finish. Score the surface with a scratch comb to provide a good key for the next coat, then allow to dry.
- Pebble dashing, an exterior finish in which small, smooth stones are embedded into the outer coat of mortar on the walls of a property, became popular after the Second World War when a lack of skilled workmen led to it regularly being used to cover up shoddy brickwork.
- Mix the render with the appropriate amount of water in a large bucket until it turns into a smooth paste.
Prepare the dashing render -- the mortar that the pebbles will be embedded into -- by mixing with the quantity of water specified by the manufacturer. Spray the wall with water and then apply the dashing coat over the basecoat at a thickness of between 8mm and 10mm.
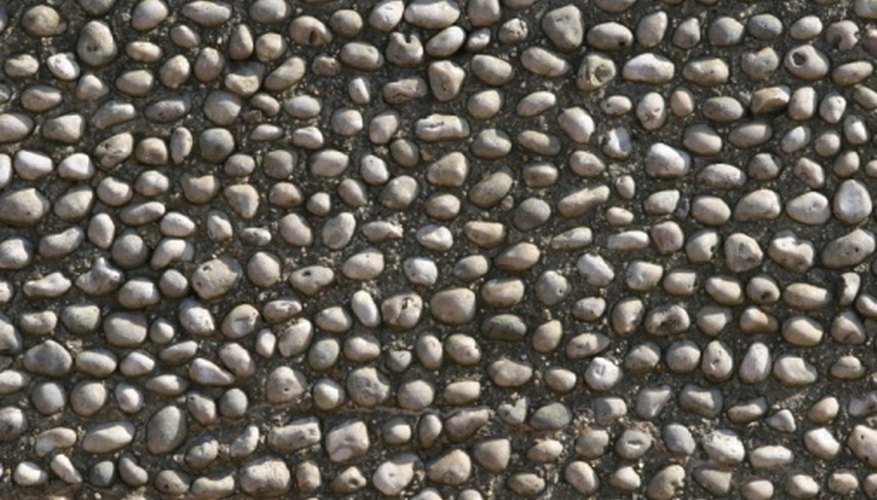
Lay plastic sheeting on the ground alongside the wall to be pebble dashed. Place the pebbles into a bucket, scoop some out with the trowel and flick them at the wall with an upward motion so that they become embedded in the wet mortar. Continue flicking until the entire wall is evenly covered. The pebbles that fail to stick will be collected by the plastic sheeting and can be reused.
- Prepare the dashing render -- the mortar that the pebbles will be embedded into -- by mixing with the quantity of water specified by the manufacturer.
- Place the pebbles into a bucket, scoop some out with the trowel and flick them at the wall with an upward motion so that they become embedded in the wet mortar.
Check the pebbles are firmly embedded in the render by pressing the float against them.
TIP
While the render is drying out, keep the surface slightly damp to help prevent it from cracking.
WARNING
Do not use pebbles directly out of the sack or bag they are supplied in. Smaller stones and any broken chips will naturally fall to the bottom and will create a different finish as you work your way through the contents. Instead, transfer the pebbles to a wheelbarrow and mix them up before placing in buckets ready for dashing.
Keep young children away from newly finished walls as they may pull out pebbles before the render has set and attempt to eat them.