Unlike many alpine ski bindings, Marker Motion ski bindings come mounted on a rail so they can slide forward and backward, depending on conditions and skiing style. As is true of all alpine ski binding manufacturers, Marker recommends that you have your bindings adjusted and tested professionally. Adjusting your binding yourself may void any warranty, and may compromise your ability to sue Marker in the event of a binding-related equipment malfunction that results in injury. However, if you are a competent skier who understands the basic concepts, you may be able to do it yourself. This article assumes that you have had your bindings mounted professionally.
- Unlike many alpine ski bindings, Marker Motion ski bindings come mounted on a rail so they can slide forward and backward, depending on conditions and skiing style.
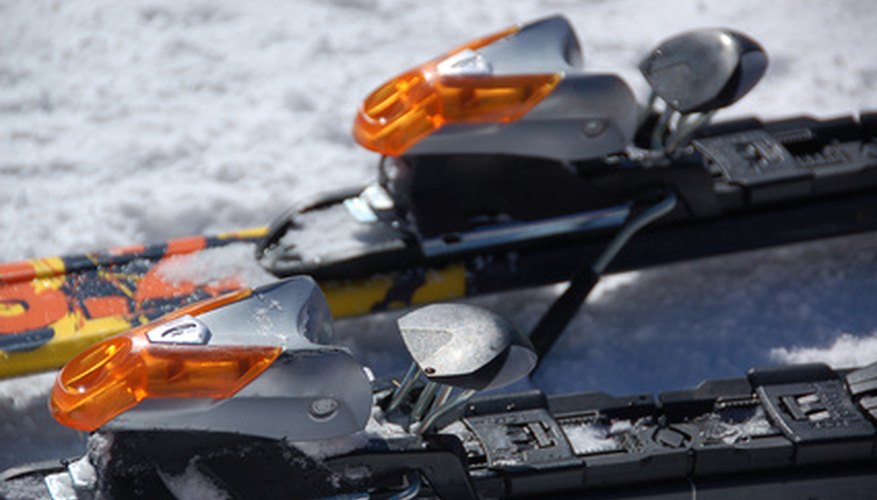
Determine where you want the centre of your boot. Many skiers like to be slightly forward or behind the centre of their ski, depending on conditions and personal skiing style. On both the heel and toe pieces, there will be a screw that releases the pin that holds the bindings in place on their rails and allows for this adjustment. When you have decided where you want your bindings, be sure to lock them back into place using the screw.
Consult a Marker DIN chart and determine your DIN number. This is the release tolerance that Marker recommends for you. These can be found online (see Resources attached to this article). You will need to know you height, weight, age, skier type, and boot-sole length. Virtually all alpine ski boot manufacturers print or emboss the sole-length in millimetres under the arch of their boots. Skier type (-1, 1, 2, 3, 3+) translates roughly into "beginner, intermediate, and expert," but it also accounts for "aggressiveness," and it is possible to be an expert while still being a type 2 skier.
- Consult a Marker DIN chart and determine your DIN number.
- Virtually all alpine ski boot manufacturers print or emboss the sole-length in millimetres under the arch of their boots.
Pop your boot into the bindings. There are large slotted screws on the outside ends of the toe and heel pieces. Use these to adjust your DIN setting as indicated in the windows on the respective pieces.
Ski. If you find that your bindings release too easily, you can try turning up the DIN setting in increments of 1 or 0.5, with the proviso that in doing so, you are knowingly violating Marker's recommendations. If your bindings don't release easily enough, you probably won't know until it's too late, so be very cautious.
TIP
Try skiing with your boots in front, behind and directly on top of the centre of your skis. Different skiing styles work better in different configurations. Many skiers prefer to be in front for freestyle skiing, on top for racing or icy conditions, and behind for powder. Only you can determine what works best for you. Both your ski and your boot sole will have marks indicating their respective centres. Use these to determine your boot position.
WARNING
Marker recommends that you always have your DIN settings adjusted professionally by Marker-certified technicians who will test them with specialised equipment. Adjusting them yourself may result in serious injury or death, and may invalidate any warranty as well as compromise your right to sue for damages. Binding adjustment and testing should be performed once a year, and is inexpensive to have done professionally--$10 to £9 is a small price to pay for peace of mind.