Repairing tiled window sills involves two processes: removing and replacing broken or loose tiles and removing and replacing deteriorated grout. Exterior tiled window sills usually are composed of harder tile secured with exterior cement rather than adhesive and grout, but the repair technique remains essentially the same. If tiles are loose and the grout is cracked, it is likely that water has got under the tile, softening the cement. This usually means the tile and grout are easier to remove, but may also mean that a damp problem needs to be fixed before undertaking the sill repair.
Preparation
Protect the work area from flying fragments of broken tile by using dust sheets canvas over the floor and fittings; plastic over the windows. Tape these as necessary to secure them.
Put on safety glasses and gloves.
Lift off any very loose tiles. If these can be salvaged for reuse, scrape backs and edges with the putty knife to remove old adhesive and grout. Set aside.
- Protect the work area from flying fragments of broken tile by using dust sheets canvas over the floor and fittings; plastic over the windows.
- If these can be salvaged for reuse, scrape backs and edges with the putty knife to remove old adhesive and grout.
Tile removal
Applying firm pressure, use a grout saw to remove grout from around damaged tiles. On exterior sills use a cold chisel.
- Applying firm pressure, use a grout saw to remove grout from around damaged tiles.
Remove broken tiles with a cold chisel or pry bar. If tiles are too attached to allow the chisel to get behind them, drill three holes in each tile using a masonry bit. Starting at the drill holes, smash the tiles from the front with hammer and chisel, and pry off fragments. Continue until all loose or broken tiles are removed.
If the replacement tiles don't exactly match the originals, remove additional tiles to correspond symmetrically with those removed due to damage -- this way replaced tiles will appear intentionally contrasting and form a balanced pattern.
Remove old adhesive cement and grout from the area to be tiled, using the putty knife or the chisel for harder deposits. If there is plasterboard beneath the tile, be careful not to gouge.
Remove all dust and loose debris. Ensure the sill is sound.
Replacement tiles
Spread tile cement over the area, using a grooved grout float.
Bed replacement tiles into cement, pressing firmly and jiggling slightly to achieve good adherence. Ensure the new tiles are set level with the originals -- adjust cement thickness as necessary to achieve this. Use spacers to ensure alignment and matched joints.
- Spread tile cement over the area, using a grooved grout float.
- Bed replacement tiles into cement, pressing firmly and jiggling slightly to achieve good adherence.
Remove excess cement. Leave to dry following manufacturer's instructions. Remove spacers.
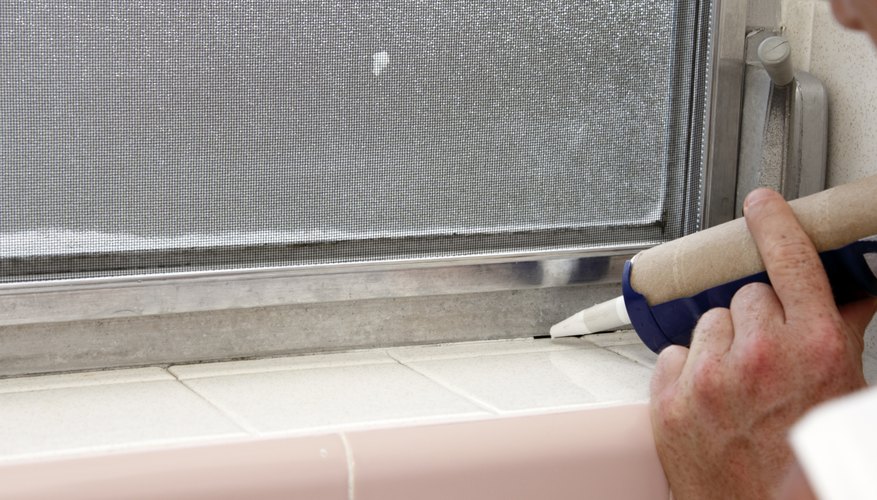
Smooth grout into joints using a float (use mortar on exterior sills). Wait 10 minutes before wiping off the excess with a damp sponge. Because the new grout is unlikely to match the old, it's usually best to re-grout the whole sill. This also will help waterproof the sill if water damage has been a problem.
After 24 hours, buff the tiles clean with a sponge.
TIP
If part of the sill is sloping or vertical, tape tiles in place until dry.
WARNING
Broken tile is extremely sharp, so always wear gloves and eye-protection.