
Raising the upper bunk on a bunk bed may be necessary when your child starts hitting his head getting into or out of the bottom bunk. It's also a good solution for college students, because standard bunks may not provide enough head room for adults.
If the post between the top and bottom bunks is similar in size to a 2-by-4, then you can easily make extensions to raise up the top bunk. Raise one side of the bunk at a time.
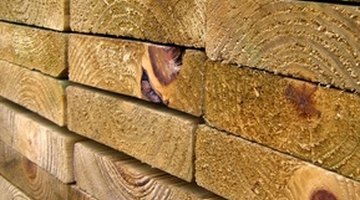
Examine the bunk bed. Measure the thickness of the wood used for the posts on the bed. You're going to extend this piece of wood, so if you want your extension to match it, try to identify the type of wood and what stain or paint was used on it. If an exact match is important to you, experiment with different types of wood and different stains before proceeding. Otherwise, you can make all of the new extensions match each other but contrast with the existing wood.
- Raising the upper bunk on a bunk bed may be necessary when your child starts hitting his head getting into or out of the bottom bunk.
- You're going to extend this piece of wood, so if you want your extension to match it, try to identify the type of wood and what stain or paint was used on it.
Use the table saw to cut the boards. Make the extensions 6 to 12 inches long if the posts are about the size of a 2-by-4-inch board. If the posts are closer in size to a 1-inch think board, you should not go ahead with adding extensions, because this technique is not recommended for such thin posts.
- Use the table saw to cut the boards.
- If the posts are closer in size to a 1-inch think board, you should not go ahead with adding extensions, because this technique is not recommended for such thin posts.

Cut the metal rod into eight pieces three inches long. Use a metal file to smooth away any rough edges on the rods. They will be concealed, but you don't want to get any burrs into your fingers while handling them. Move the file in the same direction, pushing it away from your body, smoothly and repeatedly. Turn and tilt the rod piece as necessary, to get all of the rough edges and metal burrs filed away.
Remove the top bunk and turn it upside down on the floor. Some bunk beds are connected by rods. If yours is not, mark the centre of one of the exposed post tops. Use a drill and a bit matching the diameter of the metal rod, and drill into the post to a depth of one-and-a-half inches. Drill a matching hole into the centre of the extension piece, to line up with the hole in the bunk's post.
Insert one of the metal rods into the hole in the extension and then push the rod into the post so that the exposed end of the rod slides into the post that supports the top bunk. The metal rod will disappear into the wood. Check for fit and make any adjustments if necessary. The rods should slide in and out easily, to allow for contraction in the wood in case it shrinks or expands due to temperature and humidity changes throughout the year. If the fit is too tight, remove the rod and drill slightly bigger holes. The rods shouldn't be so loose that the bed wobbles, however.
- Remove the top bunk and turn it upside down on the floor.
- If the fit is too tight, remove the rod and drill slightly bigger holes.
Mark and drill a hole into the corresponding post of the bottom bunk, if there isn't a hole there already, and drill a hole into the bottom part of the extension. So, to clarify, after you have drilled the bottom of the top bunk's post and the top of the extension piece, you will drill the bottom of the extension piece, and finally the top of the bottom bunk's post.
- Mark and drill a hole into the corresponding post of the bottom bunk, if there isn't a hole there already, and drill a hole into the bottom part of the extension.
- So, to clarify, after you have drilled the bottom of the top bunk's post and the top of the extension piece, you will drill the bottom of the extension piece, and finally the top of the bottom bunk's post.
Move to another post. Drill a hole into the post, if necessary, and into the extension piece. Make sure the holes line up and that the rods move in and out smoothly. Repeat for the other posts of the bunk bed.
Remove the extension pieces now if you wish to paint or stain them. Follow the manufacturer's instructions and allow ample time for the painted or stained wood to dry.
Assemble the bunk bed with the new extensions in place. Fit the rods into the holes in the bottom bunk's posts and slide the extensions down onto the rods. Then have two people lift the top bunk and two people guide the top bunk down onto the rods extending from the top of the extensions. Push down firmly on the top bunk to set the rods securely. Any time the bunks have to be separated, have two people raise the top bunk's head and foot simultaneously, and the top bunk will separate from the bottom bunk.
TIP
If your bunk bed already has rods, try to find metal rods that are the same size as those that came with the bed. An easy way to mark the holes so that they line up correctly is to drill one hole in the bunk bed post, then insert a crayon or thin marker (with the cap off) into that hole, and line up the extension piece with it. Press down on and wiggle the extension piece to make a mark, then drill a hole centred on that mark.
WARNING
Fingers can get smashed or pinched between the bunk posts and extension pieces, so take care when assembling and disassembling the bunk bed. Measure and mark carefully. As always, when working with the possibility of flying splinters, wear protective eyewear.