
Barbies are highly collectable fashion dolls manufactured by Mattel. Barbie's body has not changed much since the product was launched, but her facial features have changed dramatically over the last 50 years. Since Barbie's head moulds have varied, the scalpel work required on each model will be slightly different. Be sure your Barbie is not a high-end collector's item before you install glass eyes and lower the potential value of a pristine collectable.
Prepare your doll. Wash away grime with a general household cleaner that you've tested for colour fastness on the doll. Use a paper towel to rub at dirt or use a cotton swab for nostrils and ears. Twist the doll's hair into a tight bun and secure with a rubber band. Remove the doll head from the body by pulling the head directly away from the body with a firm tug.
- Barbies are highly collectable fashion dolls manufactured by Mattel.
- Wash away grime with a general household cleaner that you've tested for colour fastness on the doll.
Create a template for removing the eyes. Use an extra-fine paintbrush and washable acrylic paint to put a light layer of paint over an existing eye. Keep your paint within the eye portion of the face--or go outside the moulded lines for a custom "anime" look. Use a toothpick to remove excess paint. Allow the paint to dry.
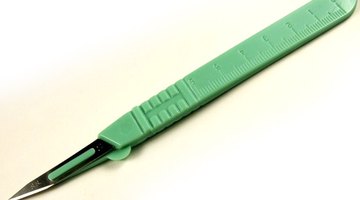
Remove the painted eye area. Use a large embroidery needle to poke a hole at the inside and outside corner of each eye. Insert a surgical scalpel tip at the inside corner of the eye, and slice towards the hole at the outside corner of the eye. You can always cut away more, but you cannot replace material, so remove the eye area using four or five slender slices.
- Create a template for removing the eyes.
- Use a large embroidery needle to poke a hole at the inside and outside corner of each eye.
Use an eye beveler tool on the inside of the new eye area. Insert the tool through the neck and sand away any material inside behind your doll's eyelids.
Apply doll eye setting wax to the inside of the head using a toothpick. Enter through the new eye holes, rather than through the neck. The wax will seal the eye in place. Use a small ball of wax, about 1/4-inch diameter, at the inside corner of each eye and additional wax if you've cut away a large area of the eye.
Insert the glass eye. Set a glass eye into the eye-setting tool in a forward-looking position (as if the eye were looking at you) and enter through the neck. The eye may shift, since this entrance hole is small. Use the eye-setting tool to push the glass eye firmly into the eye-setting wax and adjust the angle. Insert the second eye and adjust both eyes carefully to avoid a cross-eyed look.
- Use an eye beveler tool on the inside of the new eye area.
- Use the eye-setting tool to push the glass eye firmly into the eye-setting wax and adjust the angle.
Remove any exposed eye wax with a toothpick. Untie the doll's hair. Return the head to the body with very gentle pressure, to prevent the vinyl or plastic head from bending and having the glass eyes knock against each other.
TIP
Purchase a few Barbies from a thrift store. Use these inexpensive dolls to verify that your acrylic paint will not stain, to experiment with eye shapes,and to perfect your cutting technique. Use a colour of acrylic paint that is not flesh-like, but not likely to stain, such as white. Glass eyes are available on wires, but these don't work well for Barbie. The neck entrance hole is too small and you'll break or bend your wire trying to insert the eyes.