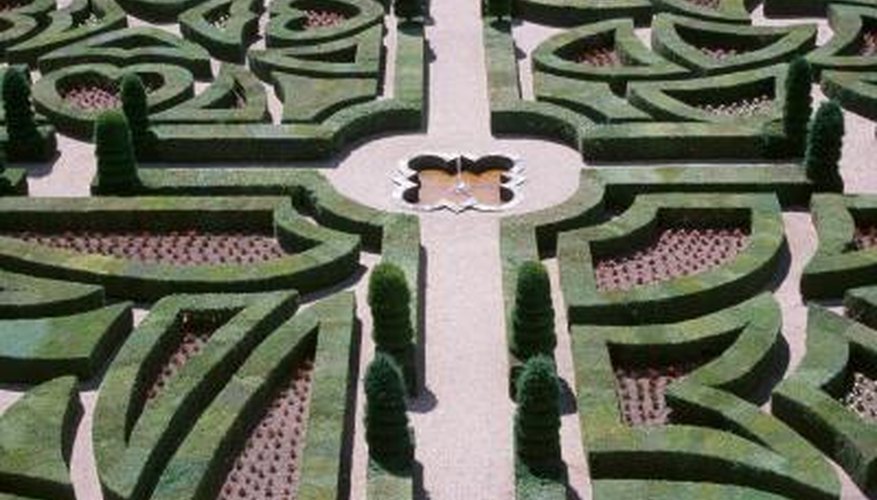
The Roman maze is made on the ground in a garden or on the floor of a building by making a patterned mosaic out of stones in contrasting colours. They were used as mazes of penitence in European churches and as decorative points in gardens. When walking through the mazes, which are typically square although clover leaf and circular mazes do exist, you walk through four quarters. One quarter of the maze is completed before moving to the next, and each section is generally symmetrical. There are no branches or tricks in the maze, you simply follow the maze's one line from the beginning to the end, tracing it through the maze's design.
- The Roman maze is made on the ground in a garden or on the floor of a building by making a patterned mosaic out of stones in contrasting colours.
- When walking through the mazes, which are typically square although clover leaf and circular mazes do exist, you walk through four quarters.
Look at historic examples of Roman mazes to get a firm grasp of how they look. Some classic examples are the maze in the floor at Chartres Cathedral in France and the mazes at Bourne Cathedral and Ely Cathedral in Cambridgeshire, England.
Trace the outer shape of your maze on a sheet of paper and cut it out. Acceptable shapes for your maze are: round, octagon, clover and square. Truly you can use any shape as long as it can be divided into four symmetric quarters.
Fold the paper in quarters. Unfold the paper so that there are creases that divide the paper into four equal and symmetric quarters.
Draw the centre of your design. This can be a flower, four-leaf clover, a circle that you will put a bird bath in or whatever you want. It should fit with your overall design and the design of the space you will be building the Roman maze in.
- Trace the outer shape of your maze on a sheet of paper and cut it out.
- This can be a flower, four-leaf clover, a circle that you will put a bird bath in or whatever you want.
Fold the paper back into quarters and trace out the design for the first quarter. It should start at an edge, trace from there to the centre and then work its way back out. It should end against the top edge of the maze shape, at a point that it can easily be joined to the next quarter.
- Fold the paper back into quarters and trace out the design for the first quarter.
- It should end against the top edge of the maze shape, at a point that it can easily be joined to the next quarter.
Unfold the paper so that two quarters are exposed: the quarter you just drew on and one of the adjoining corners. Draw out the design on the second quarter. It should be generally symmetrical to the first side, without the entrance line that led into the maze, and should adjoin to the path you drew in the first quarter.
Unfold the other half of the piece of paper and draw out the rest of the map so that it continues in a symmetric pattern that mimics the first two sections. The maze should end in the fourth quadrant in a line that moves out parallel to the entrance so that the left and right side of the maze maintain symmetry in the line path in and the path out.