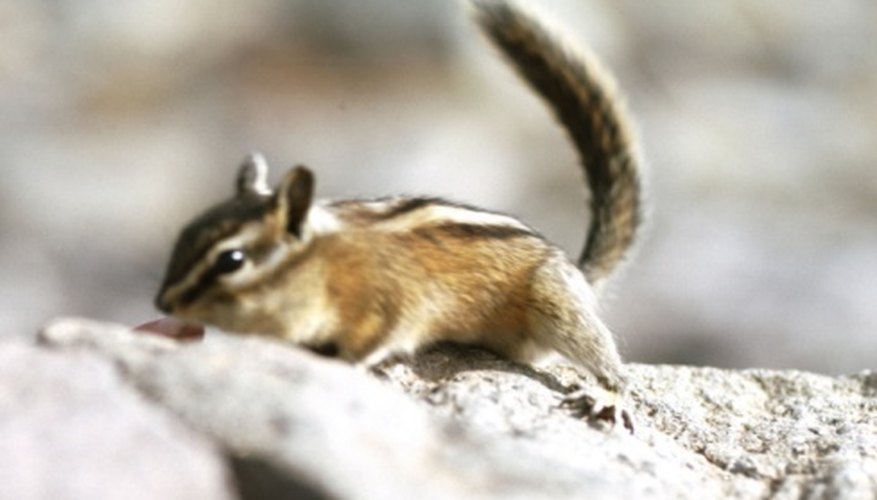
Chipmunks are unconventional pets but they can be entertaining and rewarding companions. Like all rodents, chipmunks are energetic and require a great deal of space to run and play. Because they need so much space, a large cage is required and these can get to be very expensive. If you'd like to save money while also providing your pet chipmunk with the type of habitat it needs, consider building a chipmunk cage. By building your own cage, you can customise it to your chipmunk's needs.
Determine the appropriate dimensions for your chipmunk cage. Keep in mind chipmunks like to climb, so it is important to incorporate adequate height into your cage as well as width and depth. A good size for a starter cage is 3 feet wide by 3 feet deep by 4 feet tall.
- Chipmunks are unconventional pets but they can be entertaining and rewarding companions.
- Keep in mind chipmunks like to climb, so it is important to incorporate adequate height into your cage as well as width and depth.
Cut pieces of laminated chipboard to the appropriate size for your cage. You will need one solid piece for the top, one for the back and one for the bottom. You will also need two pieces to create half walls on the two sides -- these should measure the height and half the depth of the cage. You will also need to cut a supply of 4-inch strips to connect your walls together.
Lay the piece of chipboard you are using for the back of your cage on the ground and attach a metal corner brace to each of the four corners. Line up the two half walls with the top and bottom corner braces on each side of the cage back and screw them into place. You may attach extra corner braces in evenly spaced increments down the length of the walls for extra support.
- Cut pieces of laminated chipboard to the appropriate size for your cage.
- Lay the piece of chipboard you are using for the back of your cage on the ground and attach a metal corner brace to each of the four corners.
Attach two 4-inch strips of chipboard to the top and bottom of both half walls. The combined length of the half wall and the 4-inch strip should equal the desired depth of the cage.
Attach one 4-inch strip of chipboard along the top and bottom of the front of the cage, connecting them to the strips extending from the two half walls with metal corner braces. Use at least two braces to secure the chipboard strips firmly in place.
Cut four more 4-inch strips of chipboard to the height of the cage and attach them at the front left and right corners. Using metal braces to secure them, vertically attach one board to the top and bottom strips extending from each of the two half walls and attach another to the strips running across the top and bottom of the cage front.
- Attach two 4-inch strips of chipboard to the top and bottom of both half walls.
- Cut four more 4-inch strips of chipboard to the height of the cage and attach them at the front left and right corners.
Cut three pieces of metal mesh to size for the front and sides of the cage. Use a sturdy wire mesh with openings no larger than 3/4 inches - do not use chicken wire because chipmunks will be able to chew through it and escape. The piece for the front should equal the entire measurement of the width and height of the cage and the two side pieces should be equal to the height of the cage and half the depth plus at least two inches.
Attach the mesh to the sides of the cage with a staple gun. The edges of the mesh should overlap with the chipboard by at least two inches. After stapling the mesh in place, check the inside of the cage and pound exposed staples flat with a hammer.
Screw two metal hinges into place on the back wall of the cage and lay the piece of chipboard serving as the top of the cage in place. Screw the other half of each hinge into place on the chipboard and test the hinges to be sure they work. Install a sturdy metal latch on the front of the cage to keep the lid tightly closed.
- Attach the mesh to the sides of the cage with a staple gun.
- Screw two metal hinges into place on the back wall of the cage and lay the piece of chipboard serving as the top of the cage in place.
Construct a sliding tray to use as the bottom of your chipmunk cage to make cleaning easier. Cut another piece of chipboard to size for the bottom of the cage. Create a border aligned with the edges of the tray by nailing down 1-by-2 inch boards on all four sides. Screw a wooden knob to the centre front of the tray.
Screw L brackets into the back and the two sides of the cage so that they hang down about 2-1/2 inches below the bottom of the cage. Slide the tray into place so that the side with the wooden knob is in the front of the cage.
Fill the bottom of the cage with wood chips, bark or your choice of bedding. Decorate the cage with branches, rocks, logs. Install horizontal branches for perches by screwing them into the wooden sides of the cage.
- Screw L brackets into the back and the two sides of the cage so that they hang down about 2-1/2 inches below the bottom of the cage.
- Install horizontal branches for perches by screwing them into the wooden sides of the cage.
Install a small nesting box for each chipmunk you plan to house in the cage. You may purchase a nesting box online or from your local pet store or you may simply cut an entry hole in a small cardboard box to use. Install all nesting boxes at the same height in the cage so no one chipmunk will try to claim dominance over the others.
Install a hanging water bottle on the wall of the cage and set up a sturdy food bowl. Select a heavy metal or ceramic bowl so it will not tip over if your chipmunks perch on the edge while eating.
TIP
Chipmunks tend to be solitary creatures but, given enough space, they can live happily with others. If you plan to house multiple chipmunks in one cage, be sure to provide adequate space and hiding places for both animals. Clean out your chipmunk cage frequently but do not clean out the nesting boxes more than a few times per year. You may see your chipmunks emptying out the nesting boxes on their own and bringing in fresh bedding if you provide it for them.