Sagging floors, a common problem in old homes, have many potential causes. Some are serious structural issues that require the attention of a contractor, while others are more routine cosmetic problems that you can solve yourself, if you're a fairly advanced do-it-yourselfer. If you place a tennis ball anywhere at the edge of the room and it inevitably rolls toward the middle, it's likely that you've got the second kind of problem and you might be able to take it on. This plan uses a temporary floor jack to gradually raise the middle of the floor and then secure it there with sister-joists. It assumes the problem is in a ground-floor room with a basement beneath it and open access to the floor joists.
Working in the basement, determine exactly where the joists are sagging. Do this by slowly moving your level across the bottom of the joists and watching to see how the bubble moves. Typically, you'll find that the centre joists are bending downward in the middle of the area, furthest from the support walls. Mark on the joists to show the lowest points of the sag.
- Sagging floors, a common problem in old homes, have many potential causes.
- Typically, you'll find that the centre joists are bending downward in the middle of the area, furthest from the support walls.
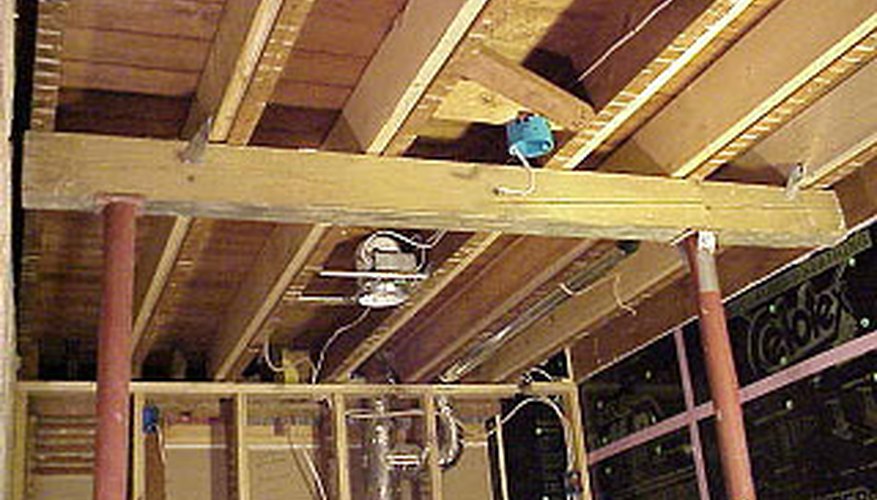
Have your two helpers hold one of the 4-by-6 beams under the joists, perpendicular to the direction of the joists so that it spans several of them at the lowest point of the sag. The narrow edge of the beam should press against the joists. While your helpers hold the beam up, attach your rafter ties. With your drill and screwdriver bit, attach long wood screws to secure the ties.
- Have your two helpers hold one of the 4-by-6 beams under the joists, perpendicular to the direction of the joists so that it spans several of them at the lowest point of the sag.
Set your second 4-by-6 beam on the floor, sitting on its narrow side, directly under the one you've just hung and running in the same direction. Stand your floor jack between the two beams, on top of the one that's on the floor, and turn the thread on the jack until it wedges under the top beam. The jack should be placed directly beneath the centre joist. Secure the jack to both beams, top and bottom, putting screws into the holes on the flat steel plates that are pressing against the wood.
Following the instructions on the jack, raise it about 1/8 inch (this will typically involve turning a lever near the top or bottom of the jack that twists up the threads). Allow it to sit like that for 24 hours, then raise it another 1/8 inch. Repeat daily, using the level each time to check the sag on the joists, until the sag appears to be gone.
"Sister" the joists to hold the newly straightened floor in place. Do this by measuring the length of each of the straightened joists from the support walls, then cutting new joists that will be secured directly to the side of the old ones. Generally, the joists will be 2-by-8s. Cut them to run as far along the old joists as they can before you hit obstructions. (Ideally, the sister joists will rest at the ends, on the same support walls that hold the old joists, but in reality this seldom works out because of obstructions.)
- Following the instructions on the jack, raise it about 1/8 inch (this will typically involve turning a lever near the top or bottom of the jack that twists up the threads).
- Ideally, the sister joists will rest at the ends, on the same support walls that hold the old joists, but in reality this seldom works out because of obstructions.)
Have your helpers hold one of the new sister-joists against one of the old ones, the flat sides against each other so you're doubling up the widths. Secure it there temporarily with your long wood screws. Now permanently secure it there with your 3-inch lag screws, using the socket drill bit to drive them into the wood. Put lag screws at the upper and lower sides of the width of the joist, every 2 feet. Repeat for each of the other joists, then remove your floor jack and 4-by-6 beams.
WARNING
If there is any indication that the problem is more than just natural sag in the joists--i.e., if there is significant rot under the floor, or failing support walls, or a sag of more than an inch--then you should have a professional look at it. The floor-raising process MUST be done incrementally and very slowly, over days, or you will cause major damage to the floor, walls and possibly the structure of the room above. Even the gradual lifting process is likely to form cracks in wall plaster that will have to be repaired.